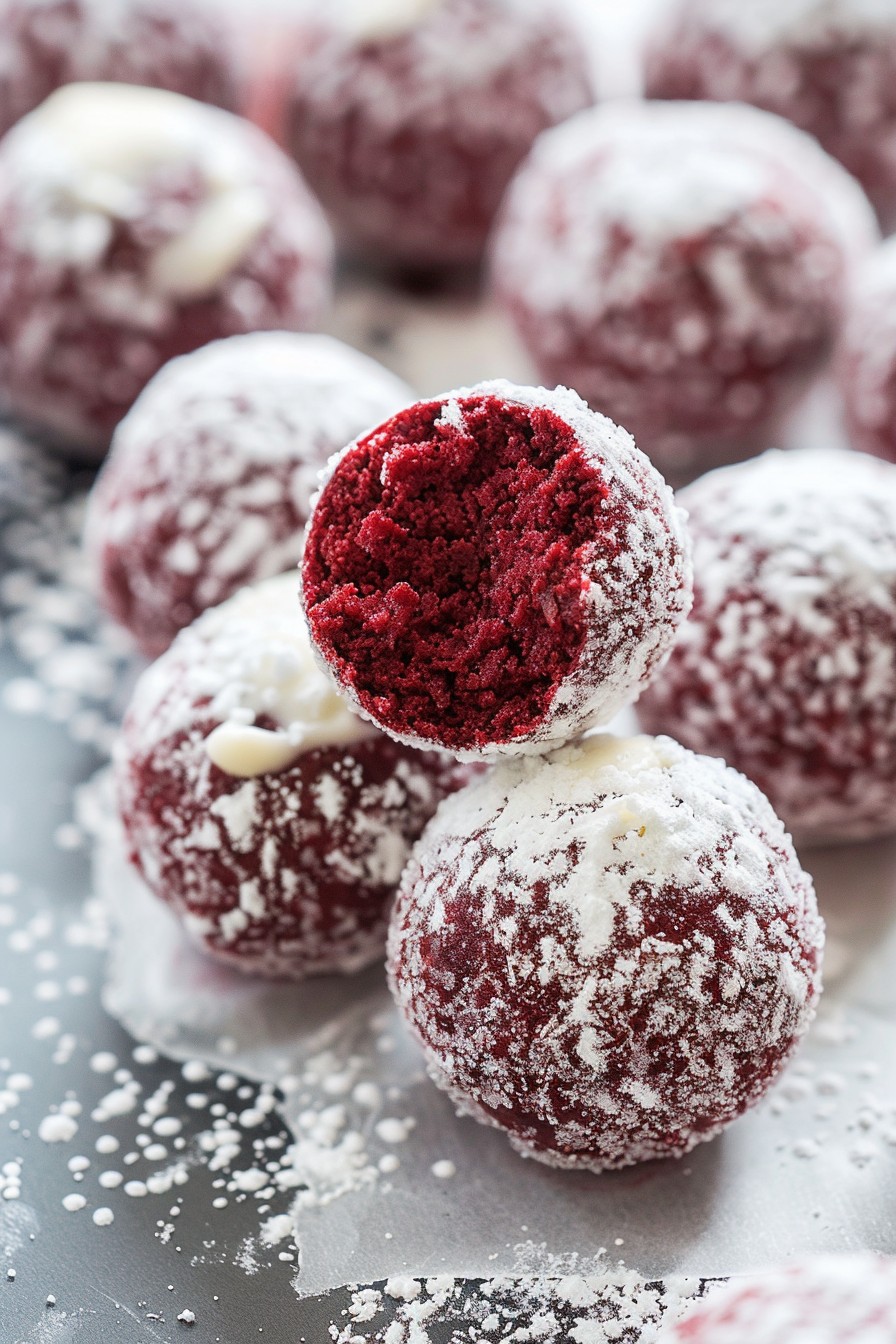
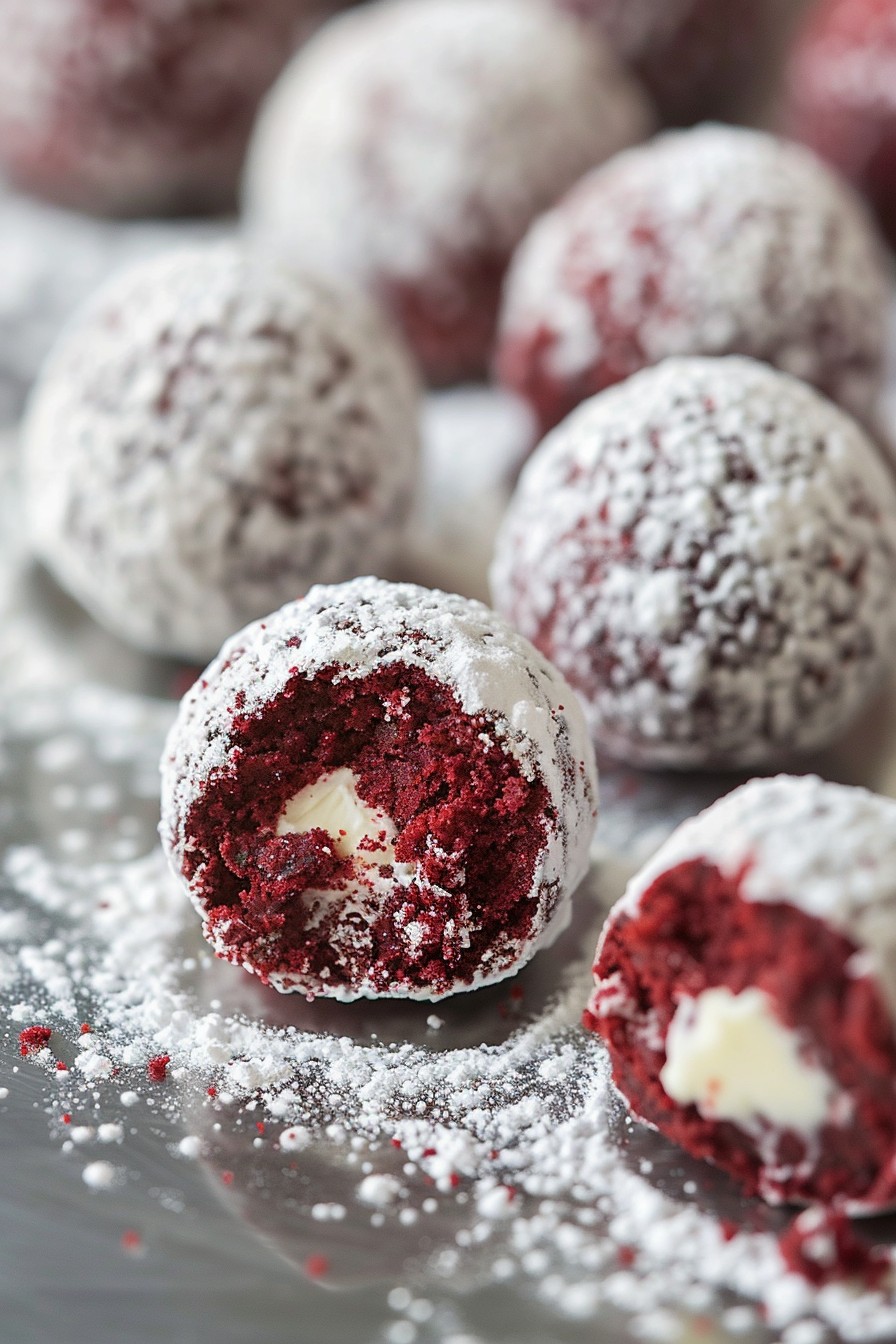
Baking these red velvet balls is like creating little drops of heaven. Perfect for parties, gifts, or just because, they’re as fun to make as they are to eat. Let’s dive into the world of no-bake treats that pack a punch of flavor and color.
Why This Recipe Works
- No baking required, making it perfect for hot summer days or when you’re short on time.
- The combination of cream cheese and red velvet creates a rich, tangy, and slightly chocolatey flavor profile.
- They’re versatile; roll them in coconut, nuts, or sprinkles for extra texture and fun.
- Perfect for portion control, each ball is a guilt-free indulgence.
- They make great gifts, especially during the holidays, packaged in cute boxes or jars.
Ingredients
- 1 box red velvet cake mix (18.25 oz)
- 8 oz cream cheese, softened
- 1/2 cup unsalted butter, softened
- 1 tsp vanilla extract
- 2 cups powdered sugar, for coating
Equipment Needed
- Large mixing bowl
- Electric mixer
- Baking sheet
- Parchment paper
- Small cookie scoop or tablespoon
Instructions
Step 1: Mix the Base
In a large mixing bowl, combine the red velvet cake mix, softened cream cheese, softened butter, and vanilla extract. Use an electric mixer on medium speed until the mixture is smooth and well combined. This should take about 2 minutes. Tip: Ensure your cream cheese and butter are at room temperature to avoid lumps.
Step 2: Chill the Dough
Cover the bowl with plastic wrap and refrigerate for at least 1 hour. Chilling the dough makes it easier to handle and shape into balls. Tip: If you’re in a hurry, you can freeze the dough for 20 minutes instead.
Step 3: Shape the Balls
Using a small cookie scoop or a tablespoon, scoop out portions of the dough. Roll each portion between your palms to form smooth balls. Place them on a parchment-lined baking sheet. Tip: Wet your hands slightly to prevent the dough from sticking.
Step 4: Coat the Balls
Pour powdered sugar into a shallow bowl. Roll each ball in the sugar until fully coated. Return the coated balls to the baking sheet. For a thicker coating, you can roll them twice.
Step 5: Final Chill
Place the baking sheet in the refrigerator for another 30 minutes to set the balls. This step ensures they hold their shape and are firm to the bite.
Tips and Tricks
For an extra layer of flavor, consider adding a teaspoon of cinnamon or cocoa powder to the dough. If you’re serving these at a party, stick a lollipop stick into each ball before the final chill for easy serving. To make them even more festive, drizzle with white chocolate or add food coloring to the powdered sugar for a colorful twist. Remember, the key to perfect red velvet balls is patience, especially during the chilling stages.
Recipe Variations
- Chocolate Lovers: Mix in mini chocolate chips into the dough before chilling.
- Nutty Twist: Roll the balls in crushed pecans or walnuts instead of powdered sugar.
- Fruity: Add a teaspoon of orange zest to the dough for a citrusy kick.
- Spicy: A pinch of cayenne pepper can add an unexpected but delightful heat.
- Gluten-Free: Use a gluten-free red velvet cake mix to cater to dietary restrictions.
Frequently Asked Questions
Can I freeze red velvet balls? Absolutely! These treats freeze beautifully. Just place them in an airtight container with parchment paper between layers. They can be frozen for up to 3 months. Thaw in the refrigerator overnight before serving.
Why is my dough too sticky? If your dough is too sticky to handle, it likely needs more chilling time. Pop it back in the fridge for another 30 minutes. Also, wetting your hands slightly can help with rolling.
Can I use homemade red velvet cake crumbs instead of a mix? Yes, you can! Just ensure the crumbs are fine and you’ve adjusted the butter and cream cheese quantities to achieve the right consistency. The dough should hold together when pressed.
Summary
These red velvet balls are a no-bake, easy-to-make treat that’s perfect for any occasion. With their rich flavor and fun presentation, they’re sure to be a hit. Customize them with your favorite coatings or mix-ins for a personal touch.